
InDesign Training: Rounded Corners
To help speed up your workflow it’s good to utilise some of the hidden gems explored in our InDesign Training. To add corner effects you can always use the Corner Options menu item under Object > Corner Options. One great new feature in InDesign CS6 is it’s live corners feature. This time-saving feature allows you to add rounded corners instantly.
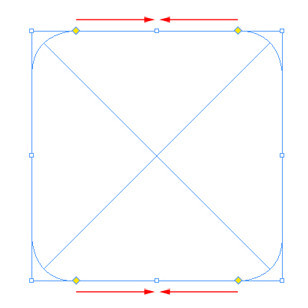
1) Draw a rectangle or square frame, click on the yellow box attached to the frame.
2) This will activate four new yellow boxes at each corner.
3) Click on one of them and drag horizontally into the center of the frame, as you do this the four corners will form curves.
4) Further editing tips when using live corners:
- Hold Shift and drag a corner to adjust that corner only.
- To edit the roundness of a corner click on the yellow square to activate the corners then adjust the yellow corner handles as required.
- To make the corners square again simply click on the yellow square to activate the corners, then drag the yellow handles back to the edge of the frame.
- Alt clicking on a yellow corner repeatedly, changes the corner style from rounded to fancy, to bevel and through other styles and back to square corner.
As mentioned, detailed options for adding corner affects can also be found by going to Object > Corner Options.

Comments